How often do you think about the tools you use every day?
When was the last time you thought about why your computer keyboard is laid out the way it is? Defaults chosen for us over 100 years ago! While QWERTY mostly works, it has some ergonomic and efficiency drawbacks. In the mechanical keyboard community, being able to change what each key does is the first step to taking ownership over these tools we use on a daily basis.
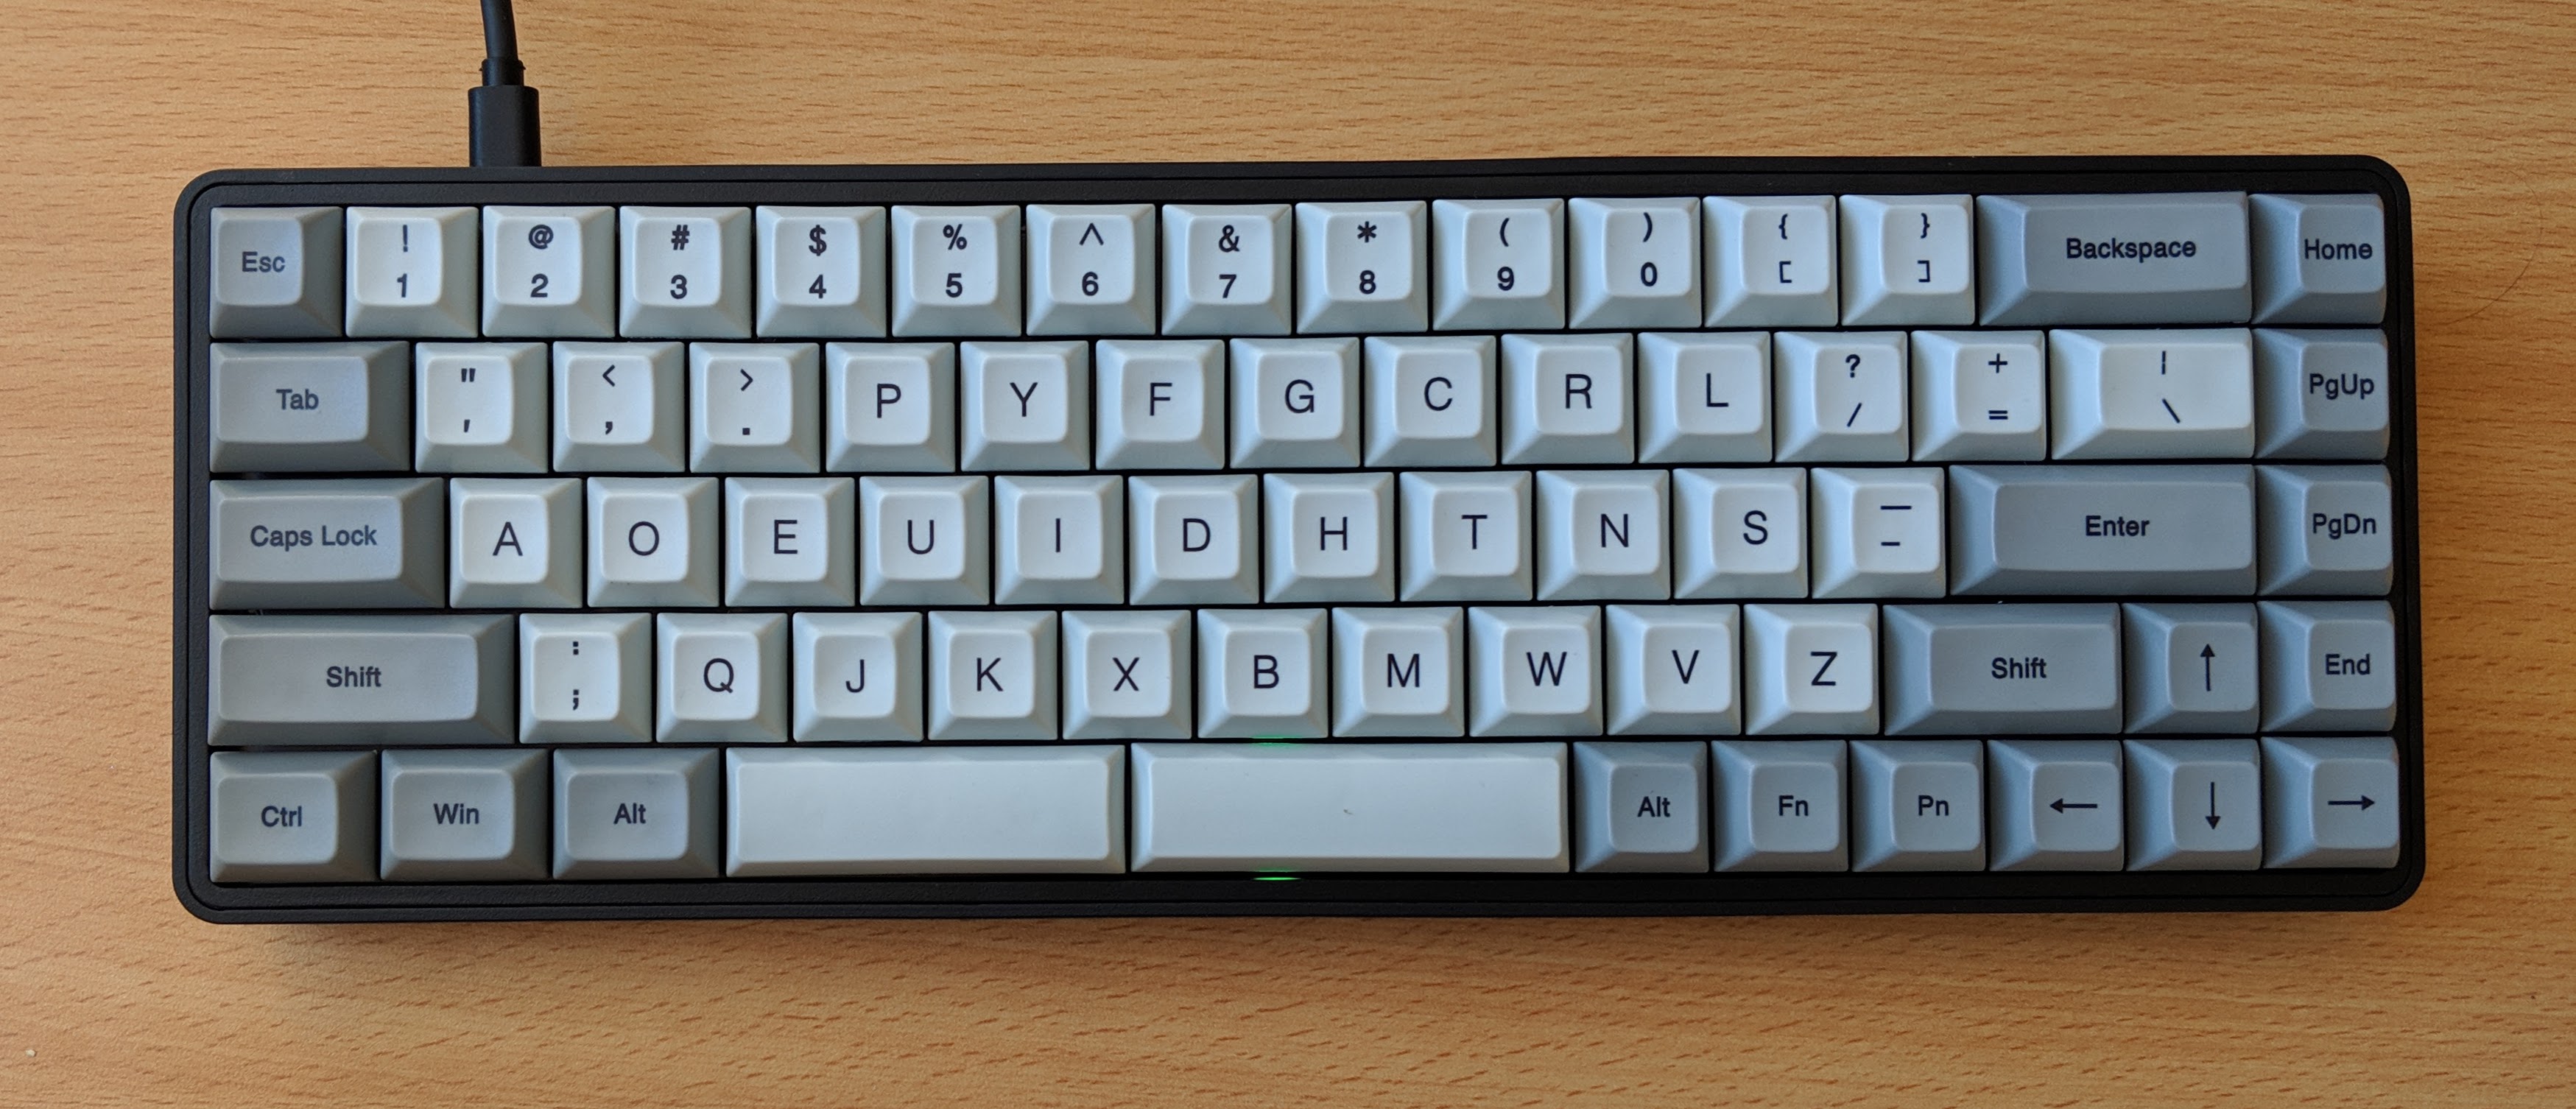
Custom mechanical keyboards are the next step and live at the nexus of ergonomics and aesthetics. Designing a full keyboard (key layout, firmware, circuit board, components, and case) is arguably the highest form of this art. If you work on a computer, designing and building your own computer keyboard gives you the opportunity to craft a tool specifically for you and the way you work. With a focus on efficiency, many custom keyboards reduce the number of keys they need, denoted by the difference in size from a standard 100+ key keyboard. 60% keyboards are common, 40% keyboards are less so, and (for a crazy few), keyboards as small as 20% are possible.
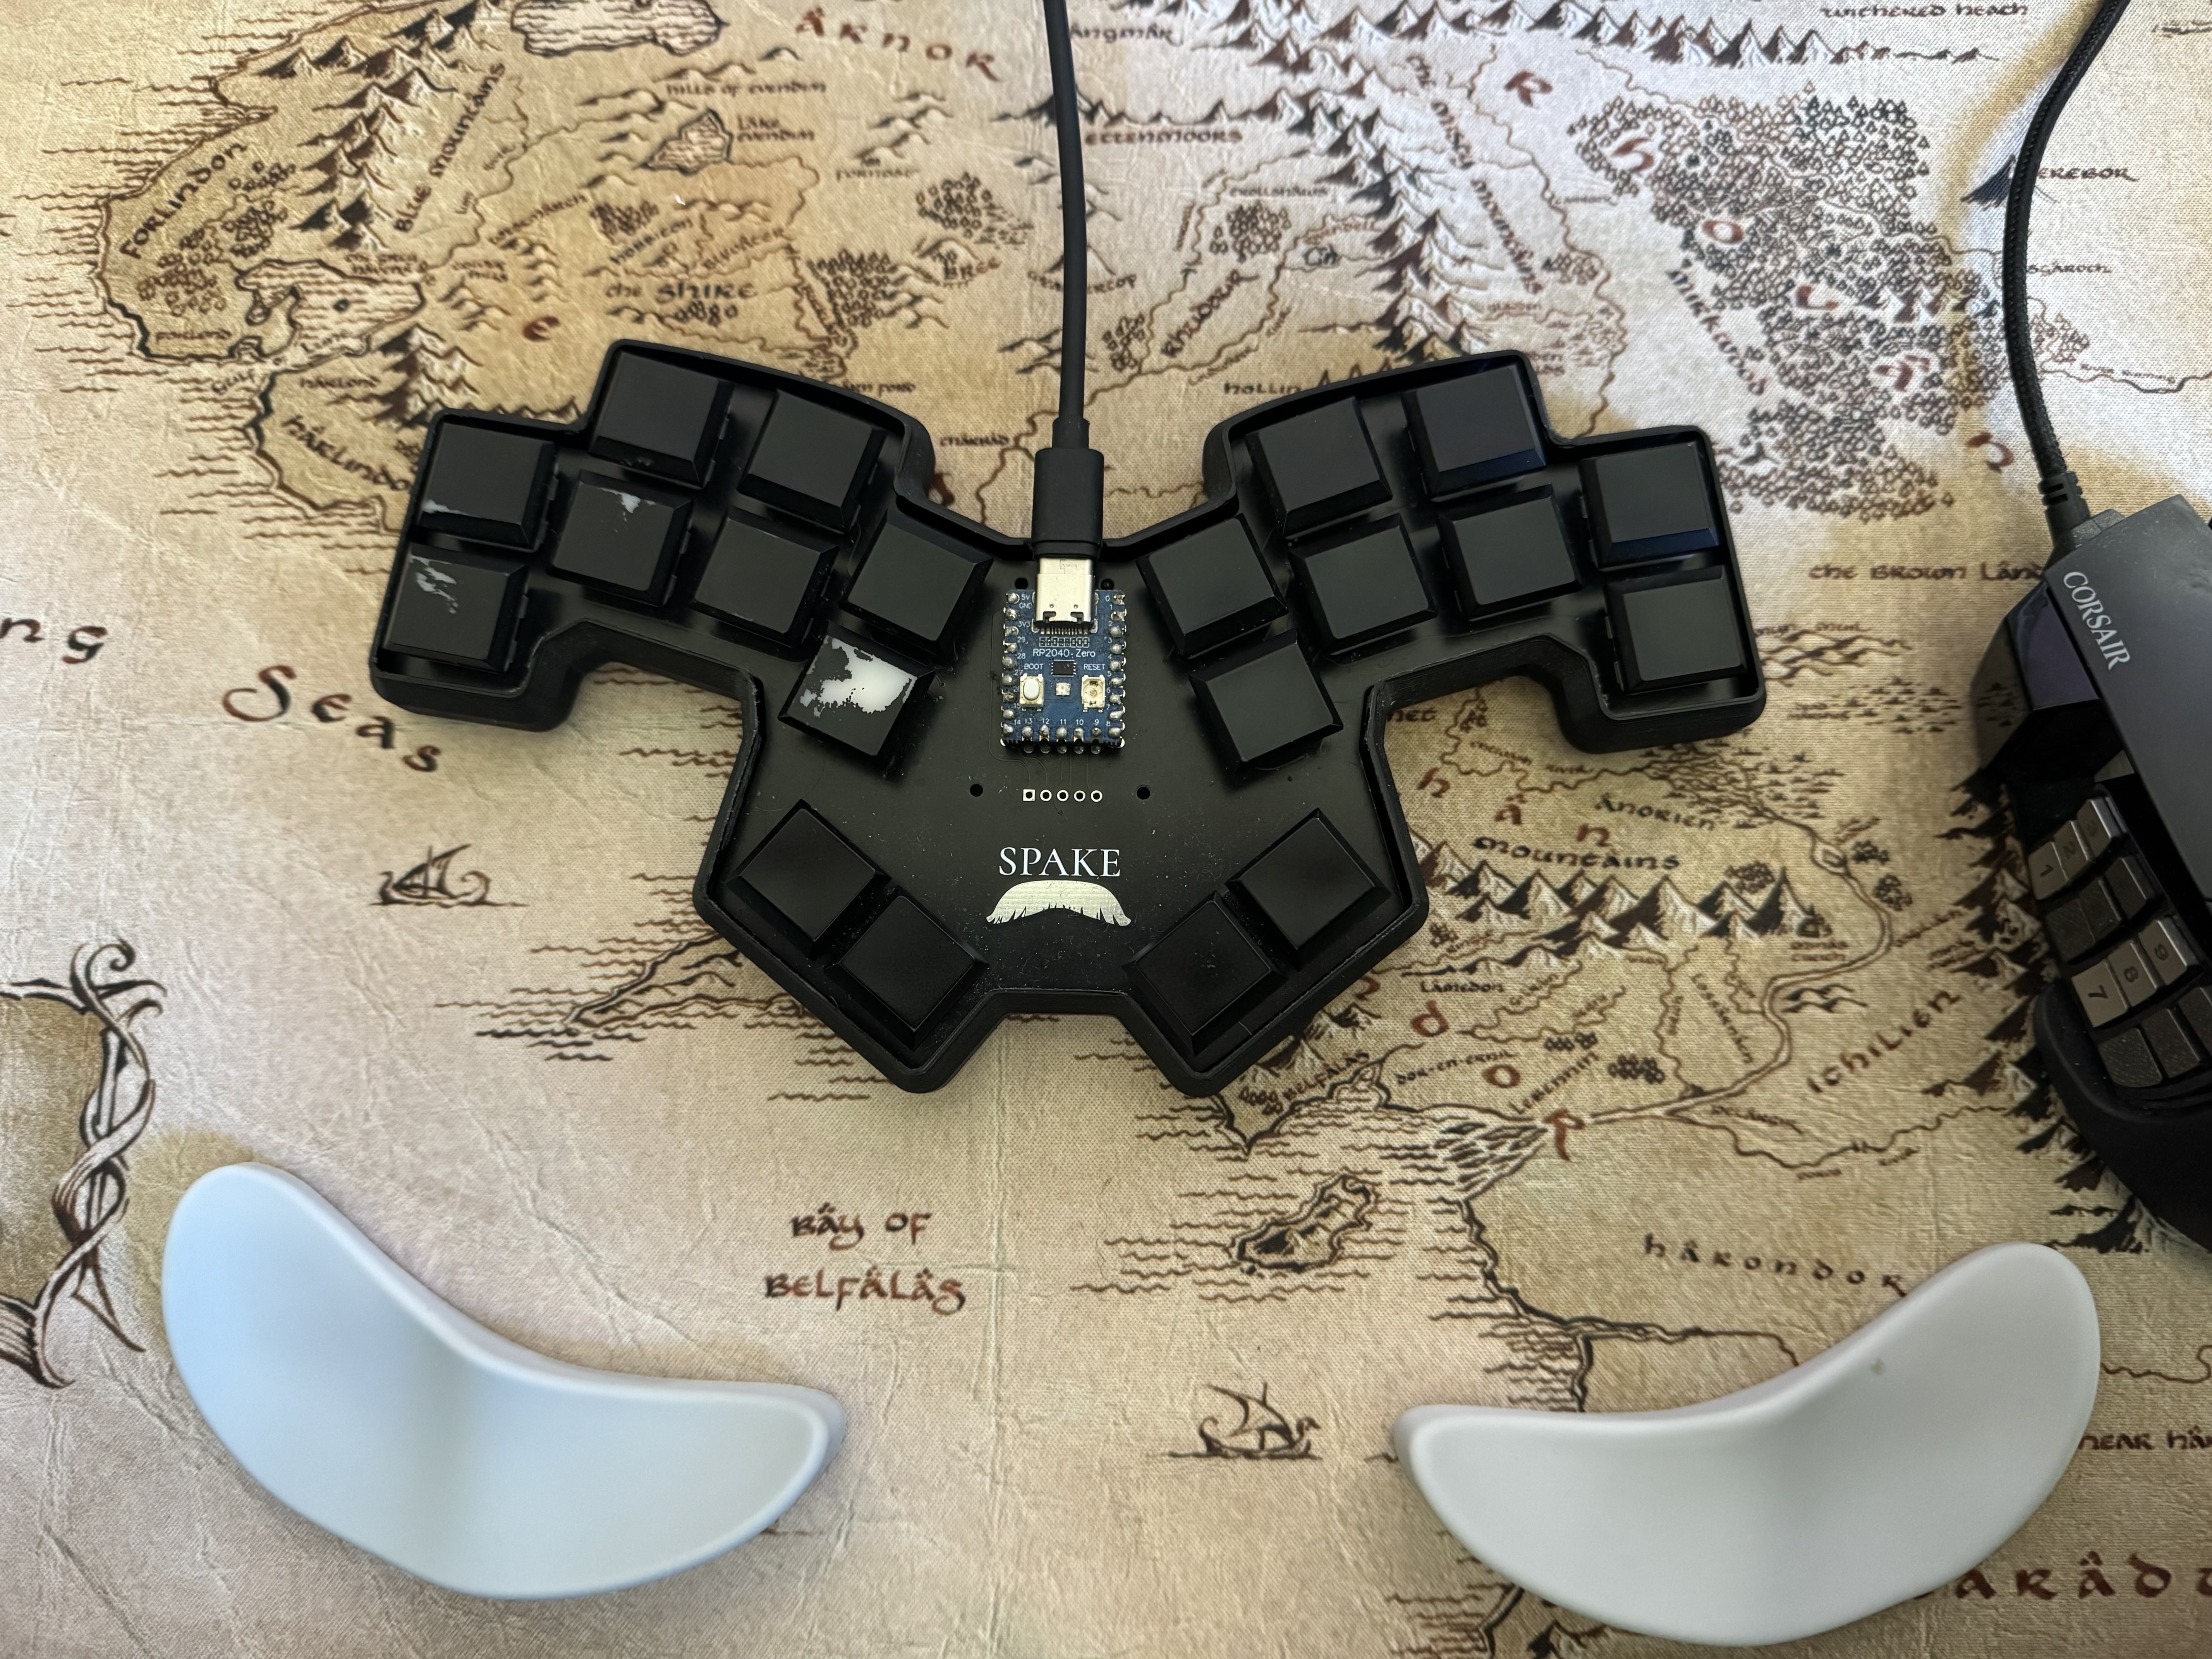
This is where this story starts. I wanted to learn to create a super small keyboard for myself. I set a goal of creating a keyboard with only 20 keys: two for each finger (and thumb). To do so, I would have to learn a little bit of electrical engineering, firmware design, and component assembly. I had no previous experience in these topics, and there are no ‘all in one’ courses to learn how to do this, so it was all self-directed. At the end of it, I might have a keyboard that looked cool, but was unusable.
Starting from curiosity
I’d been buying pre-built keyboards for years, occasionally tinkering with small modifications, but I’d never designed one from the ground up. A first attempt back in 2020 went nowhere, I didn’t have the background knowledge I needed yet. Circuit design, firmware, and component selection were all unfamiliar and it was a lot to take on at once; I wasn’t ready yet.
So I didn’t force it. Instead, I spent the next few years lurking in mechanical keyboard communities, absorbing design inspiration, and slowly building context. By 2023, I felt ready to try again.
Learning from everywhere
There’s no single course that teaches “how to design a custom keyboard from nothing.” Instead, I had to piece together a curriculum of my own from wherever I could find it: official documentation, YouTube tutorials, forum threads, community Discord servers, open-source projects on GitHub, blogs, and component datasheets.
None of these sources told the whole story on their own. A lot of the work was cross-referencing conflicting advice, filling gaps between what a tutorial assumed I already knew and what I actually knew, and slowly building a mental model solid enough to make my own design decisions. By the end I understood why the keyboard worked, which meant I could actually troubleshoot it and keep extending it, not just use it.
What should it look like?
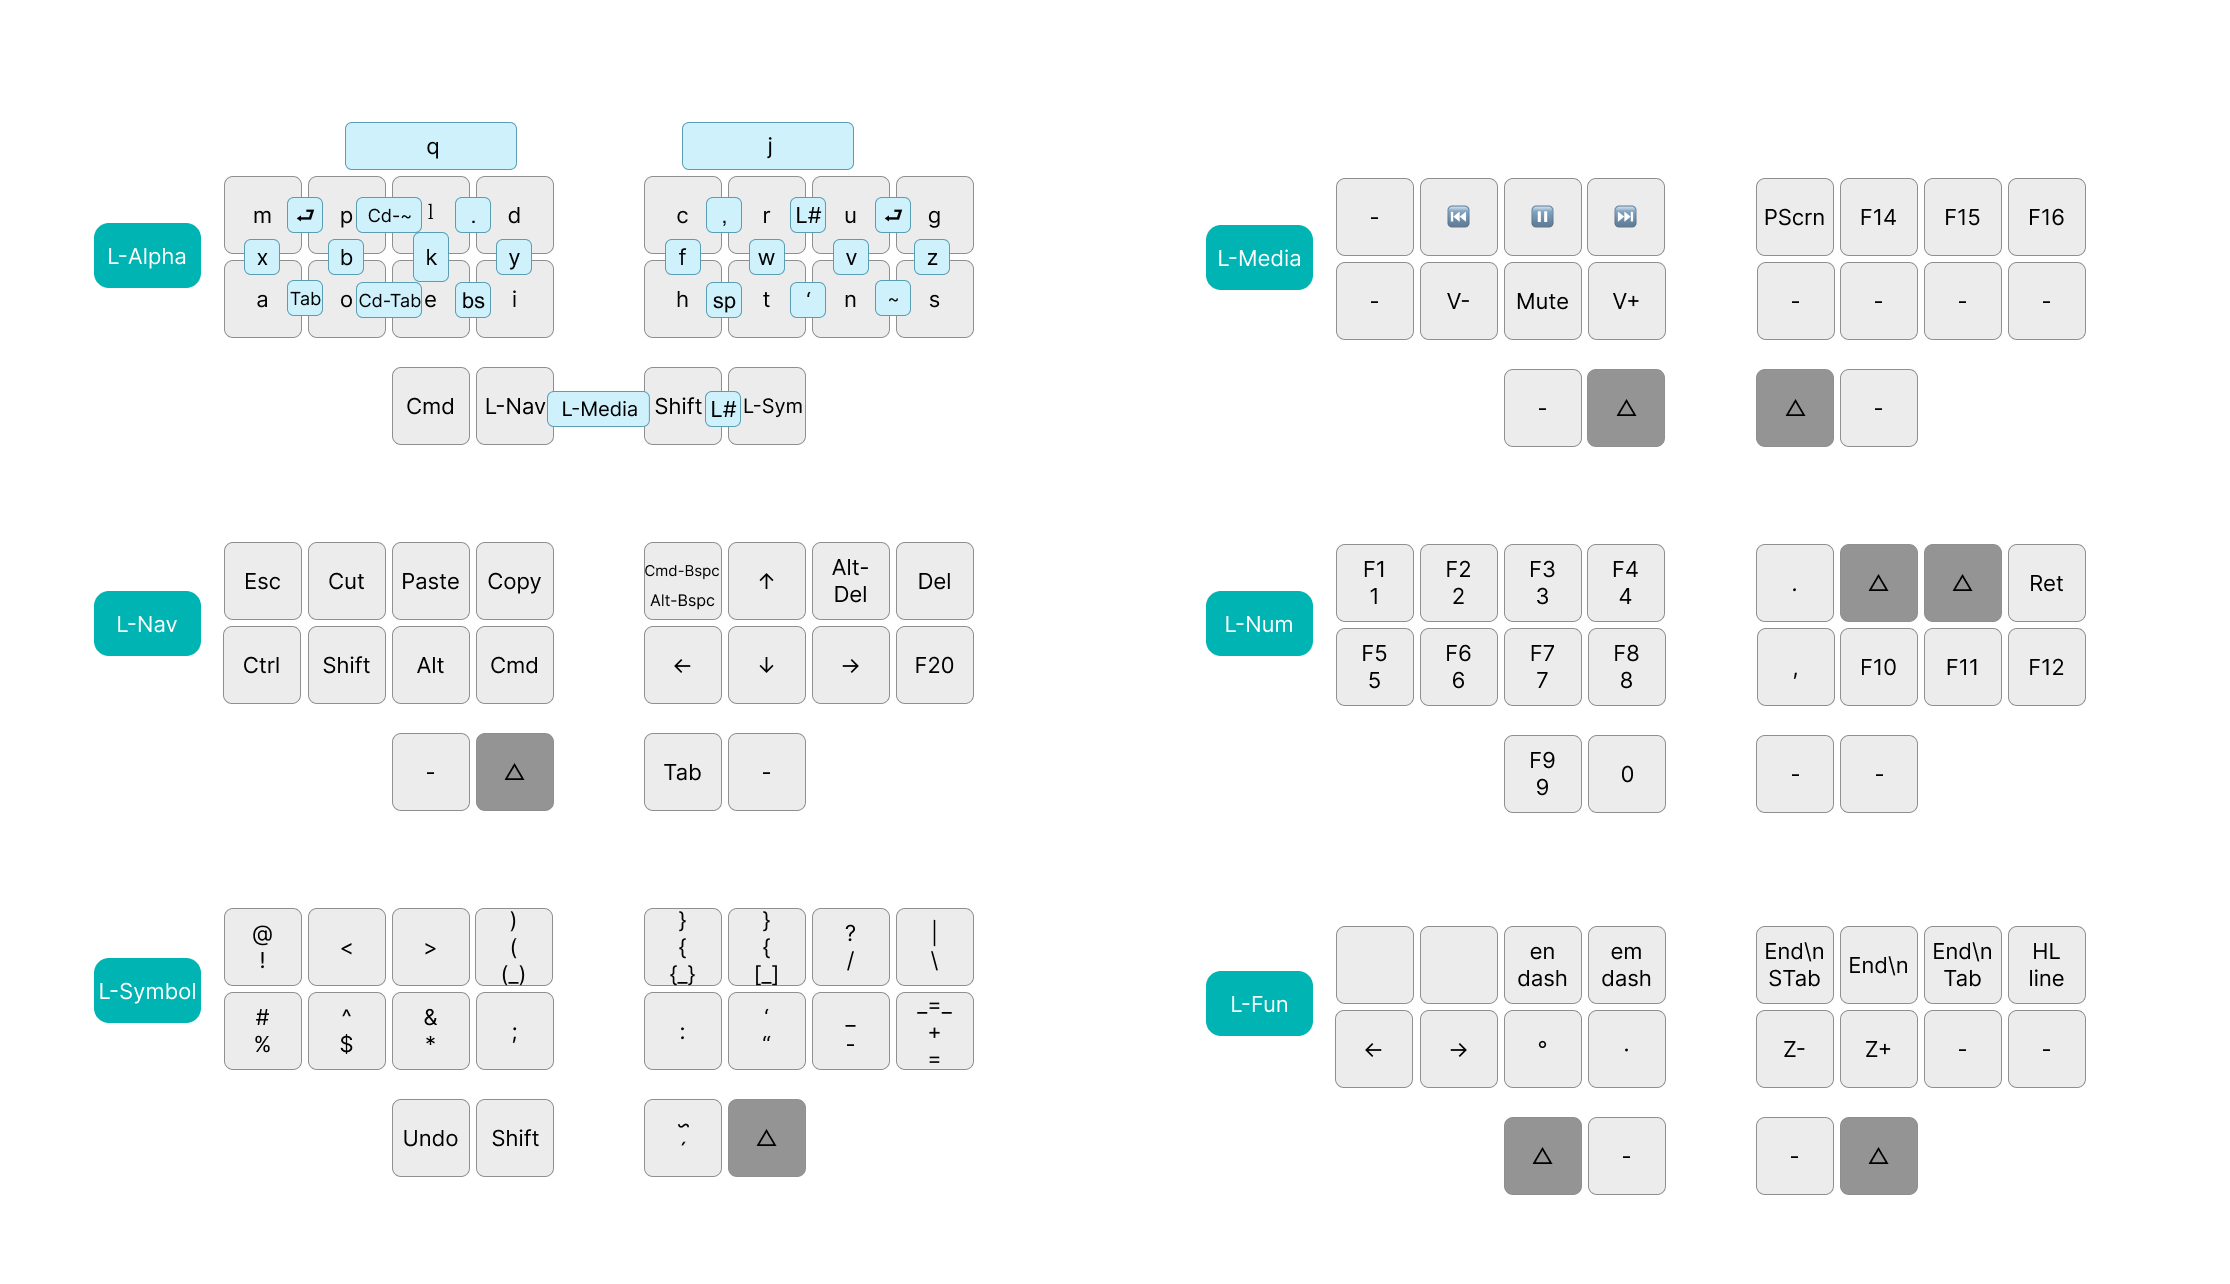
Design started on paper, the simplest possible way to test a layout idea before committing to anything technical. Once the rough shape felt right, I moved into Figma to refine the key positions and try out different layouts more precisely, nudging spacing and testing finger reach before touching anything physical.
Choosing components came next: keyswitches (the single biggest factor in how a board feels to type on), diodes, and a microcontroller. None of these decisions exist in isolation, each one has to work correctly with the others in the final circuit, so I leaned again on YouTube, community discussions, and example projects on GitHub to understand what “correct” actually looked like.
I’m not an electrical engineer
This was the first real challenge of the project, because the circuit board design needs to be correct for the keyboard to actually work. Even a single mistake can mean a board that just doesn’t function.
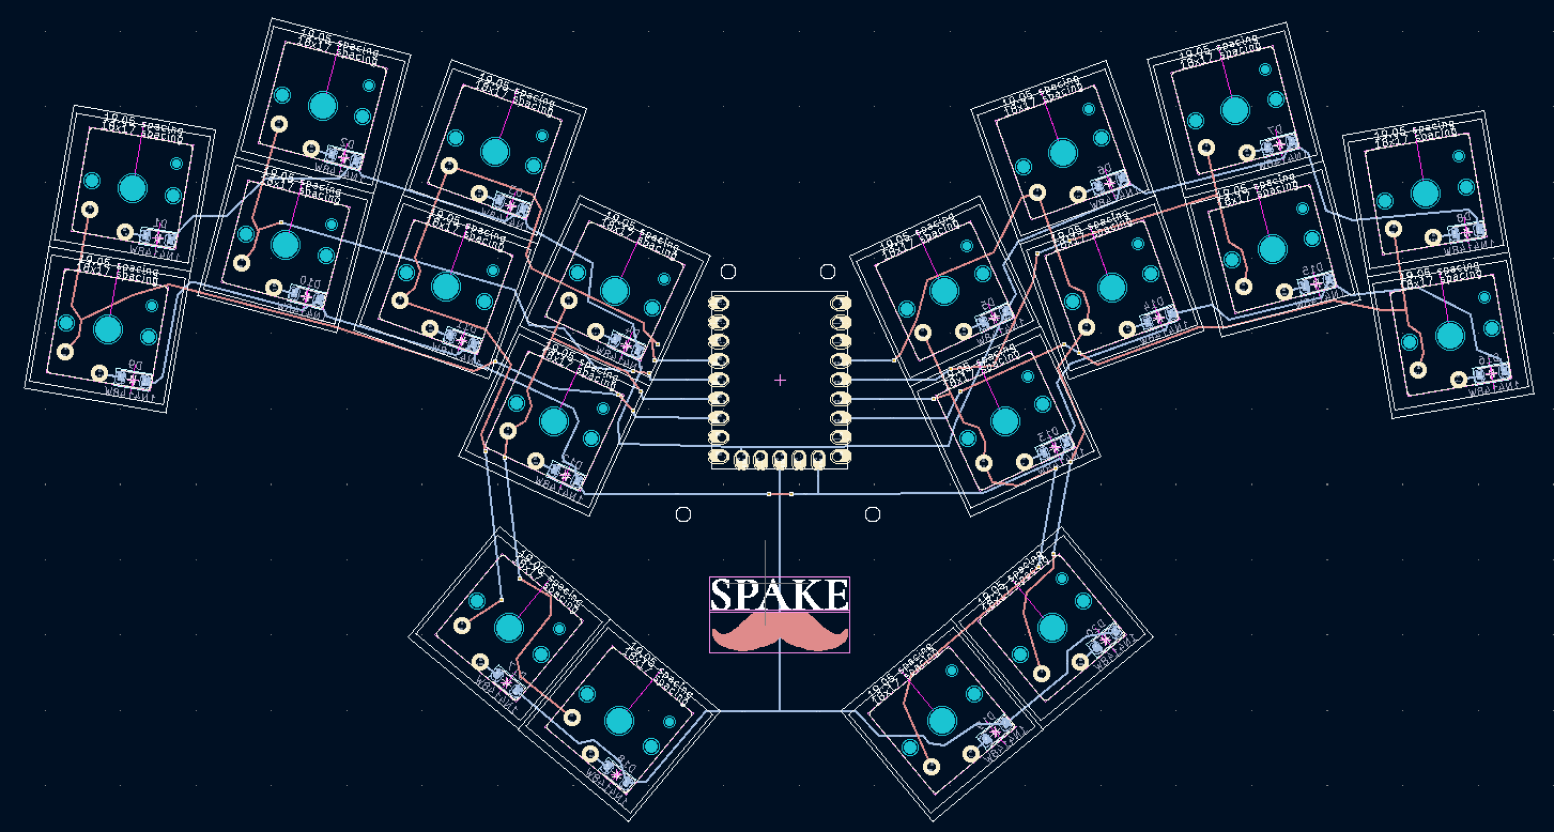
I taught myself KiCad from scratch, reading the documentation and watching a lot of YouTube tutorials about keyboard circuit design. I made plenty of mistakes along the way, but each one taught me something about the electronics I hadn’t understood before, so there was no wasted time.
Let’s get physical
With a finished PCB design, I sent it off to JLCPCB for manufacturing (making it a real thing!). There was a lot of technical jargon to work through via forums and videos before I felt confident submitting the order. Once the boards arrived, I hand-soldered the physical components together.
A working circuit board is only half a keyboard though. It still needs firmware to turn keypresses into something a computer understands. I chose ZMK, an open-source keyboard firmware, and started again from zero: documentation, community guides, YouTube walkthroughs, and reference implementations on GitHub got me to a working build.
Did it work?
It works! There was one small mistake in the PCB design, but I was able to use my new understanding to hack a fix to the problem.
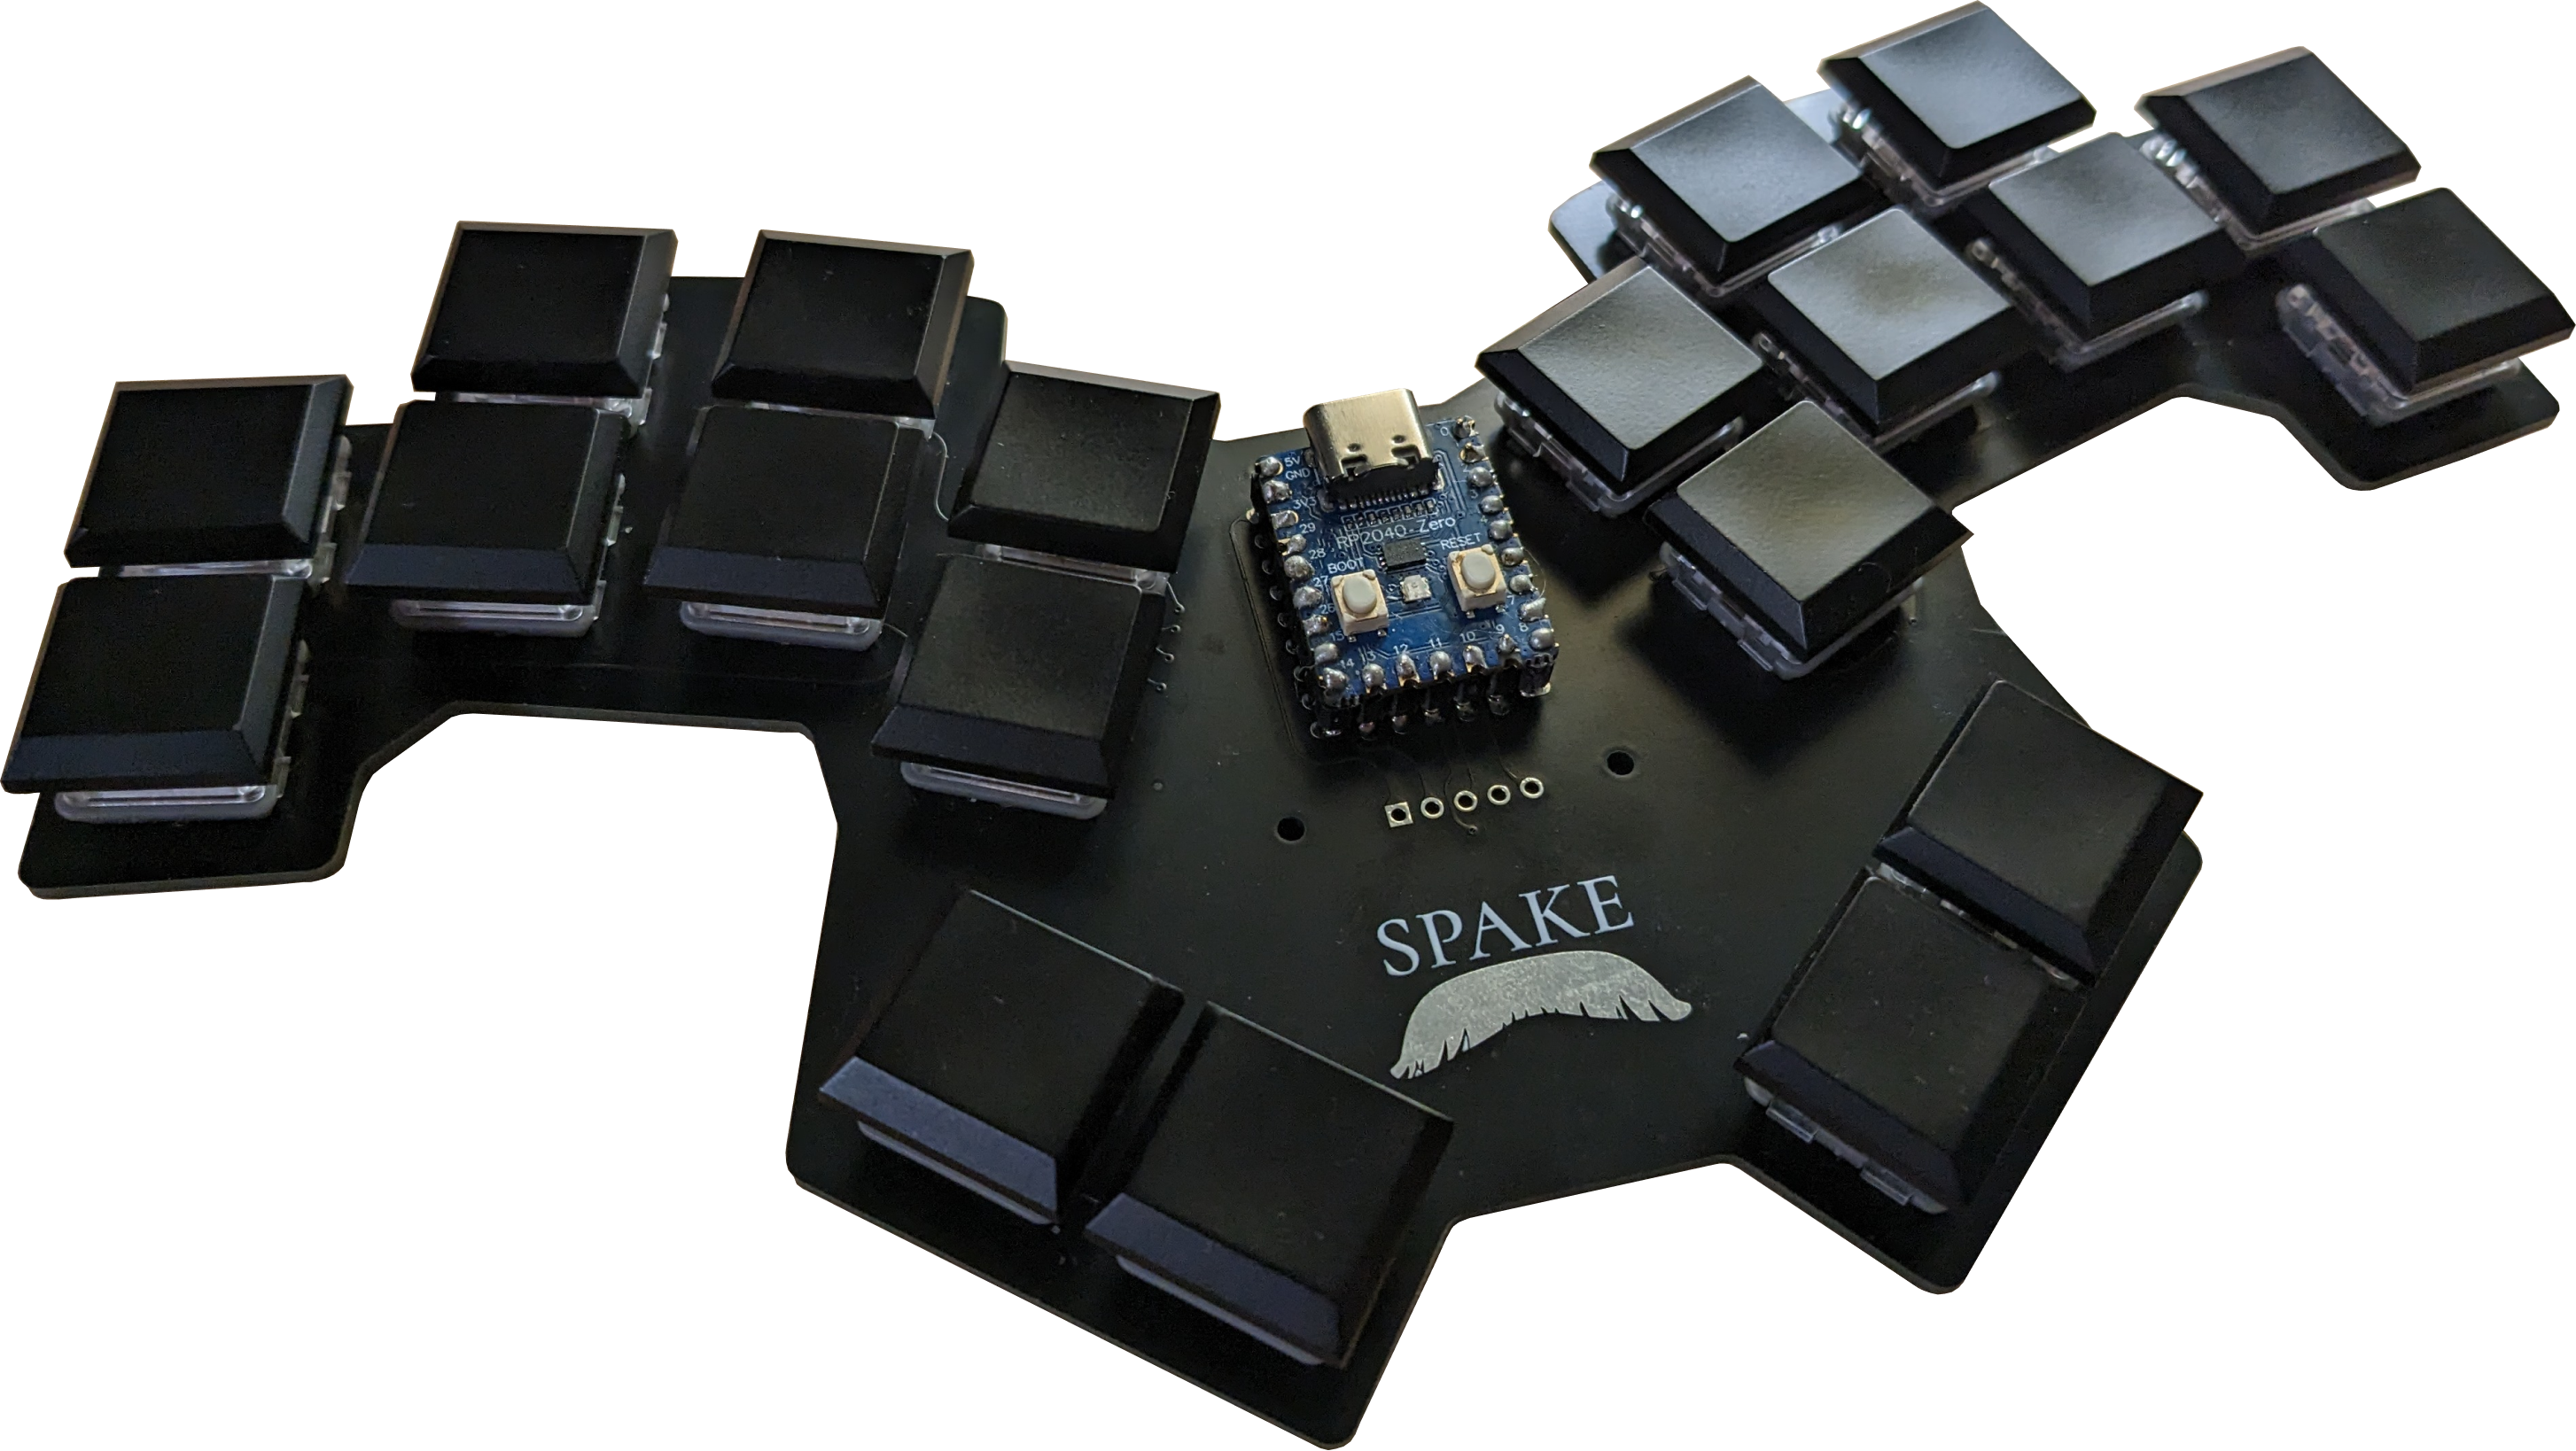
I’ve been typing on it daily for around three months now, and I’m up to roughly 70 words per minute. The thing that still strikes me most is how little my hands have to move compared to a standard keyboard.
Now that the electronics are sorted, I’m turning to the next problem: designing and 3D printing a case for it to live in.
What did I learn?
Strip away the keyboard-specific detail, and this project was really an exercise in:
- Self-directed learning across unfamiliar domains: piecing together electrical engineering, PCB design, firmware development, and fabrication from scattered, often incomplete resources, with no single course to follow.
- Iterative design: moving from paper sketch to digital prototype to a working circuit board, refining at each stage based on what the last one taught me.
- Learning from failure in a technical, high-stakes context: a design mistake here wasn’t just a matter of taste, it decided whether the thing worked at all.
- Patience as a working method: some problems just take time and distance to solve, and no amount of forcing it speeds that up.
A 20-key keyboard is a small, slightly odd thing to hold up as an achievement. But the process behind it, teaching myself several new technical disciplines well enough to combine them into one working object, is the part I’m proudest of.
2026 update
I’ve been daily-driving this keyboard now for over 3 years (and I 3D printed the case!). It’s gotten me through my Masters thesis, causes no end of funny looks when I use it in public, and still brings me joy every time I use it.